


1. PREPARE THE VASE FOR THE DIY ROSES CENTERPIECE
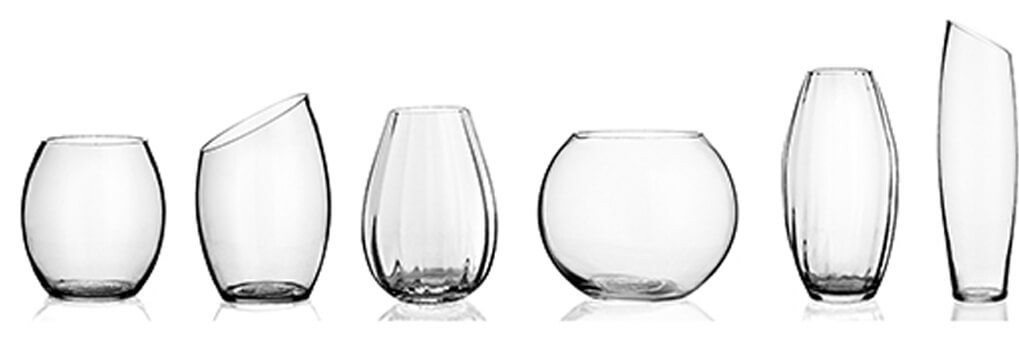
CHOOSE THE VASE
Once you have ordered and received your DIY Pack of roses, fillers and greens; you need to choose the right vase. We recommend designing your DIY centerpiece with a cylinder vase of 7 to 11 inches long. If you prefer using a vase of different form, make sure it has a wide mouth.
CLEAN THE VASE
Pour a little amount of dishwashing liquid into the vase and add water. Clean thoroughly with the soapy water to remove any bacteria that can deteriorate the roses, greens and filler of your DIY roses centerpiece and rinse until there’s no residue of dishwashing liquid.
ADD FLOWER FOOD
Pour fresh water into your vase and add the flower food provided in the right proportions. Make sure to follow the instructions of the packet. Overdose or underdose of flower food is detrimental to the vitality of the roses, greens and fillers of your DIY roses centerpiece. It cause stem discoloration, burning of leaves and petals, and delayed opening. Never use aspirin or soda pops as substitutes of flower food.
2. ADJUST THE FLOWERS OF YOUR DIY ROSES CENTERPIECE
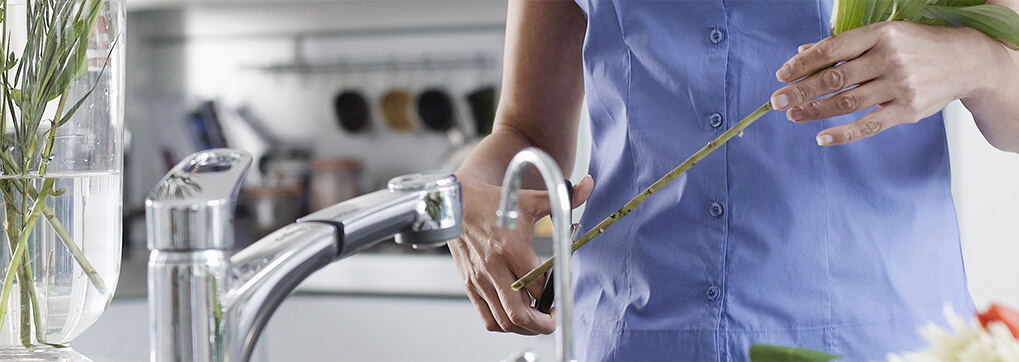
CUT THE STEMS
After carefully unpacking your roses, fillers, and greens, trim the stems evenly; up to 7 inches taller than the height of your vase. Make a diagonal sharp cut (45 degree angle) as this will help the flowers of your DIY roses centerpiece draw enough water. In order to avoid crushing the stems, use clippers or a sharp knife instead of scissors.
DISCARD WILTING PETALS AND LEAVES
Occasionally, few petals and leaves of your DIY roses centerpiece may arrive slightly damaged. This doesn’t mean the roses, fillers and greens are dying; it’s rather a consequence of transportation. Remove wilting petals and leaves from your fresh flowers as these could decrease their vase life.
REMOVE ROSES LEAVES UNDER THE WATERLINE
We don’t recommend removing all leaves along the stem; except for those under the water line, which can get rotten over time. Foliage is essential in the hydration of roses. If you remove all leaves, the roses of your DIY roses centerpiece will block water uptake to prevent infections. Similarly, avoid removing rose thorns. Wounds caused in the process attract unwanted microorganisms that reduce roses’ vase life.
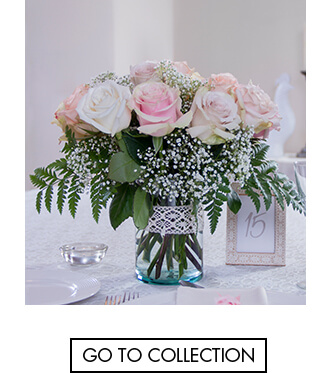
3. CREATE THE DIY ROSES CENTERPIECE
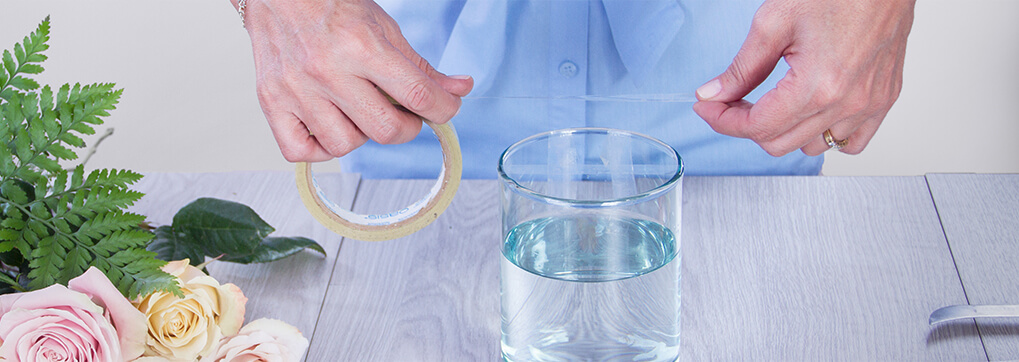
FORM A GRID OVER THE VASE
Using waterproof tape of 1/2 inches, create a criss cross pattern over the mouth of the vase you chose for your DIY roses centerpiece. Make sure that the gaps in between the tape are not too big or too small. Consider that you need to place one or two stems per gap.
DISTRIBUTE THE ROSES ACROSS THE VASE
Arrange the roses of the DIY centerpiece evenly along the tape grid and alternate their colors. Make sure the stems are placed towards the same imaginary center point in the vase.

ADD THE FILLERS AND GREENS
Once the roses are all set, it’s time to add the fillers and greens of your DIY centerpiece. Start by placing the greens in a position that creates an imaginary triangle, as shown in the picture below. Finish the arrangement by adding the fillers in the spaces in between the roses.

Check out our DIY packs of fresh roses designed for unforgettable events: